When it comes to caring for your mechanical keyboard, mastering the art of cleaning and maintaining keycaps is essential for both novices and seasoned enthusiasts alike. In this comprehensive guide, I'll walk you through everything you need to know to ensure your keycaps stay pristine and your keyboard functions flawlessly. From basic cleaning routines to advanced maintenance tips, this article covers it all. Whether you're looking for simple daily upkeep or deep cleaning strategies, I've got you covered with practical techniques and expert advice to keep your keycaps sparkling and your keyboard in top-notch condition.
Introduction to Keycap Cleaning
Keeping your mechanical keyboard’s keycaps clean is vital for both looks and performance. Keycaps collect dirt, oils, and grime from daily use, leading to a dull appearance and potential issues. Regular cleaning preserves their appearance and extends their lifespan.
Keycap cleaning may seem daunting, but with the right tools and knowledge, it's easy. Whether you’re new to mechanical keyboards or an experienced user, this guide provides practical tips. You’ll learn simple daily cleaning routines and more intensive deep cleaning methods to keep your keycaps in top condition.
Regular cleaning prevents dust and oil buildup, keeping your keyboard fresh and improving your typing experience. This guide covers essential tools, daily and deep cleaning routines, and advanced maintenance tips. By the end, you’ll be able to maintain your keycaps like a pro, ensuring your keyboard stays in excellent shape.

Tools and Materials You'll Need
To effectively clean your keycaps, having the right tools and materials is essential. These items will help you remove dirt, grime, and stains efficiently without damaging the keycaps or keyboard.
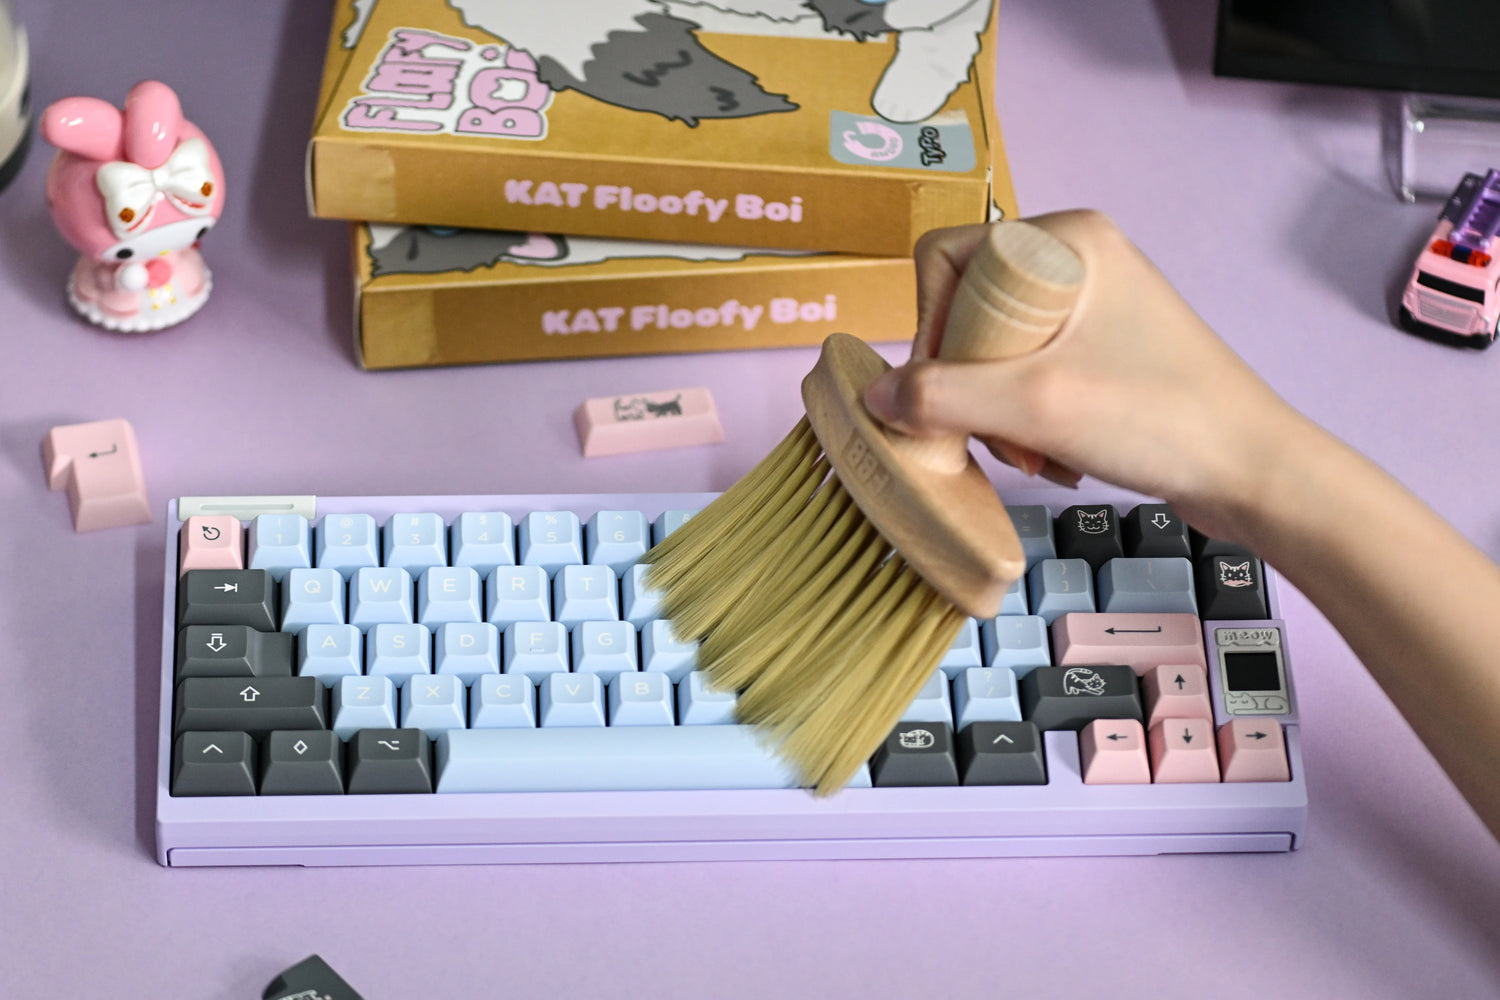
First, you'll need a soft brush. A soft-bristled brush gently removes dust and debris from the keycaps and spaces between them. It's perfect for daily cleaning, allowing you to quickly sweep away particles that accumulate over time. A dedicated keyboard cleaning brush or a soft paintbrush works well.
Another crucial tool is a keycap puller. This small device safely removes keycaps without causing damage. Wire keycap pullers are preferred because they provide a secure grip and reduce the risk of scratching. Using a keycap puller ensures easy removal and reattachment of keycaps, making cleaning more efficient.
For cleaning, you’ll need a mild solution. Warm soapy water is effective for most keycaps. Mix a small amount of dish soap with water to break down oils and grime without harming the material. Alternatively, use isopropyl alcohol for deeper cleaning, particularly on stubborn stains. Use it sparingly and ensure it’s properly diluted to avoid damage.
Microfiber cloths or paper towels are essential for drying the keycaps. After cleaning, ensure the keycaps are completely dry before reassembling them. Microfiber cloths are highly absorbent and gentle, making them ideal for this task. They quickly wick away moisture and leave no lint behind.
A small container or bowl for soaking the keycaps is handy. This allows you to submerge the keycaps in the cleaning solution, ensuring a thorough clean. Choose a container large enough to hold all the keycaps you plan to clean but not excessively large.
Lastly, consider a UV light sanitizer. While not essential, a UV sanitizer helps eliminate bacteria and microorganisms, providing extra cleanliness, especially if you share your keyboard with others or use it in a public space.
By gathering these tools and materials, you'll be well-prepared to clean and maintain your keycaps effectively. Each item plays a specific role in the cleaning process, ensuring your keycaps remain in excellent condition with minimal effort.

Daily Cleaning Routine
Incorporating a daily cleaning routine for your keycaps can significantly extend their lifespan and keep your keyboard looking pristine. Daily maintenance doesn’t have to be time-consuming or complicated. Here’s a detailed guide to maintaining your keycaps on a daily basis.
Start by using a soft brush to sweep away any dust or debris on the keycaps and between the keys. A soft-bristled brush, such as a keyboard brush or a small paintbrush, works perfectly. This quick step takes less than a minute and keeps your keyboard free of visible dirt.
Next, use a slightly damp microfiber cloth to wipe down the keycaps. The cloth should be just moist enough to pick up oils and smudges without dripping. Gently wipe each keycap, focusing on areas where your fingers frequently touch. Follow up with a clean, dry microfiber cloth to remove any remaining moisture.
If you use your keyboard heavily, a quick mid-day wipe can help maintain cleanliness. Keep a microfiber cloth handy and give the keycaps a light wipe during a break. This practice reduces the need for more intensive cleaning sessions.
Maintain a clean environment around your keyboard. Avoid eating or drinking near your keyboard to minimize the risk of spills and crumbs. If you eat at your desk, brush away any crumbs immediately. Keeping your workspace clean reduces the amount of dirt that can find its way onto your keyboard.
Wash your hands before using your keyboard. Clean hands transfer less oil and dirt to the keycaps, making them easier to keep clean in the long run. This simple habit makes a significant difference in the cleanliness of your keyboard.
By incorporating these daily cleaning practices, you can keep your keycaps looking new and ensure your keyboard remains a pleasure to use. Regular maintenance not only preserves the appearance of your keycaps but also contributes to a healthier and more hygienic workspace.
Deep Cleaning Methods
Deep cleaning your keycaps is essential for maintaining their appearance and performance. Here’s a straightforward guide to effectively deep clean your keycaps.
Start by removing the keycaps with a keycap puller. Gently place the puller over a keycap, pull upwards, and set the removed keycaps aside. Work methodically to avoid losing any keycaps.
Prepare a mild cleaning solution by filling a bowl with warm water and adding a few drops of dish soap. Stir to create a gentle, soapy mixture. Submerge the keycaps and let them soak for 15-20 minutes to loosen any dirt, grime, or oils.
After soaking, use a soft brush to scrub each keycap individually, focusing on stubborn dirt or stains. Ensure the brush is gentle enough to avoid scratching the keycaps but firm enough to remove residue. Rinse each keycap thoroughly under running water to remove any soap.
Proper drying is crucial. Place the keycaps on a clean towel or drying rack and let them air dry completely. Avoid using heat sources like hairdryers, as excessive heat can warp or damage the plastic. Ensure no moisture remains to prevent issues when reassembling the keyboard.
Stain Removal Techniques
Removing stubborn stains from your keycaps requires specific techniques to ensure they look their best. Here’s a concise guide to effective stain removal.
For common stains like ink or food, create a thick paste of baking soda and water. Apply it to the stained areas and use a soft brush to gently scrub. Baking soda is mildly abrasive and lifts stains without damaging the keycaps. Rinse thoroughly with water to remove all residue.
For tougher stains, use isopropyl alcohol. Dampen a cotton swab or cloth with alcohol and gently rub the stained area. Alcohol dissolves oils and stubborn residues that soap and water can't remove. Use sparingly to avoid damaging the plastic.
Another effective method is using a magic eraser. Slightly dampen the eraser and gently rub it over the stained areas. Magic erasers, made of melamine foam, remove surface stains without harsh chemicals. Use a light touch to avoid wearing down the keycap surface.
After treating the stains, rinse the keycaps under running water to remove any cleaning agents. Dry them thoroughly on a clean towel or drying rack, ensuring no moisture remains.
By using these targeted stain removal techniques, you can maintain the appearance and longevity of your keycaps, keeping them looking as good as new.
Click to learn more about keycap expertise.

コメントを書く
このサイトはhCaptchaによって保護されており、hCaptchaプライバシーポリシーおよび利用規約が適用されます。